Search This Blog
Showing posts with label Easter. Show all posts
Friday, April 22, 2011
Easter Eggs by Aunt Darla and Family
I had fun decorating Easter Eggs with my kids a few weeks ago. My Aunt Darla and her daughters did the same, and came up with these inspired creations at her home. Very imaginative! Love them.

Thursday, April 21, 2011
Easter Eggs!
Today was a great day. Nobody is sick anymore, and there were no after-school activities (math club, dance class) to take me away from a fun activity with my kids. So what did we do? Easter eggs of course!

Now let me preface this post by saying that I know I'm no Martha-Stewart. You want Martha-Stewart looking eggs? You're looking for my sister...she, guaranteed, will make the most beautiful easter eggs you've ever seen. But me? I'm in it for the mess, and the memory with my kids. So here are some things we experimented with (as inspired by a 2007 edition of "Family Fun" magazine):
Nature Eggs
Items Needed:
A few interesting shaped leaves or flowers
An old pair of nylons
Egg Dye (you can get this anywhere, but I found mine at the Dollar Store)
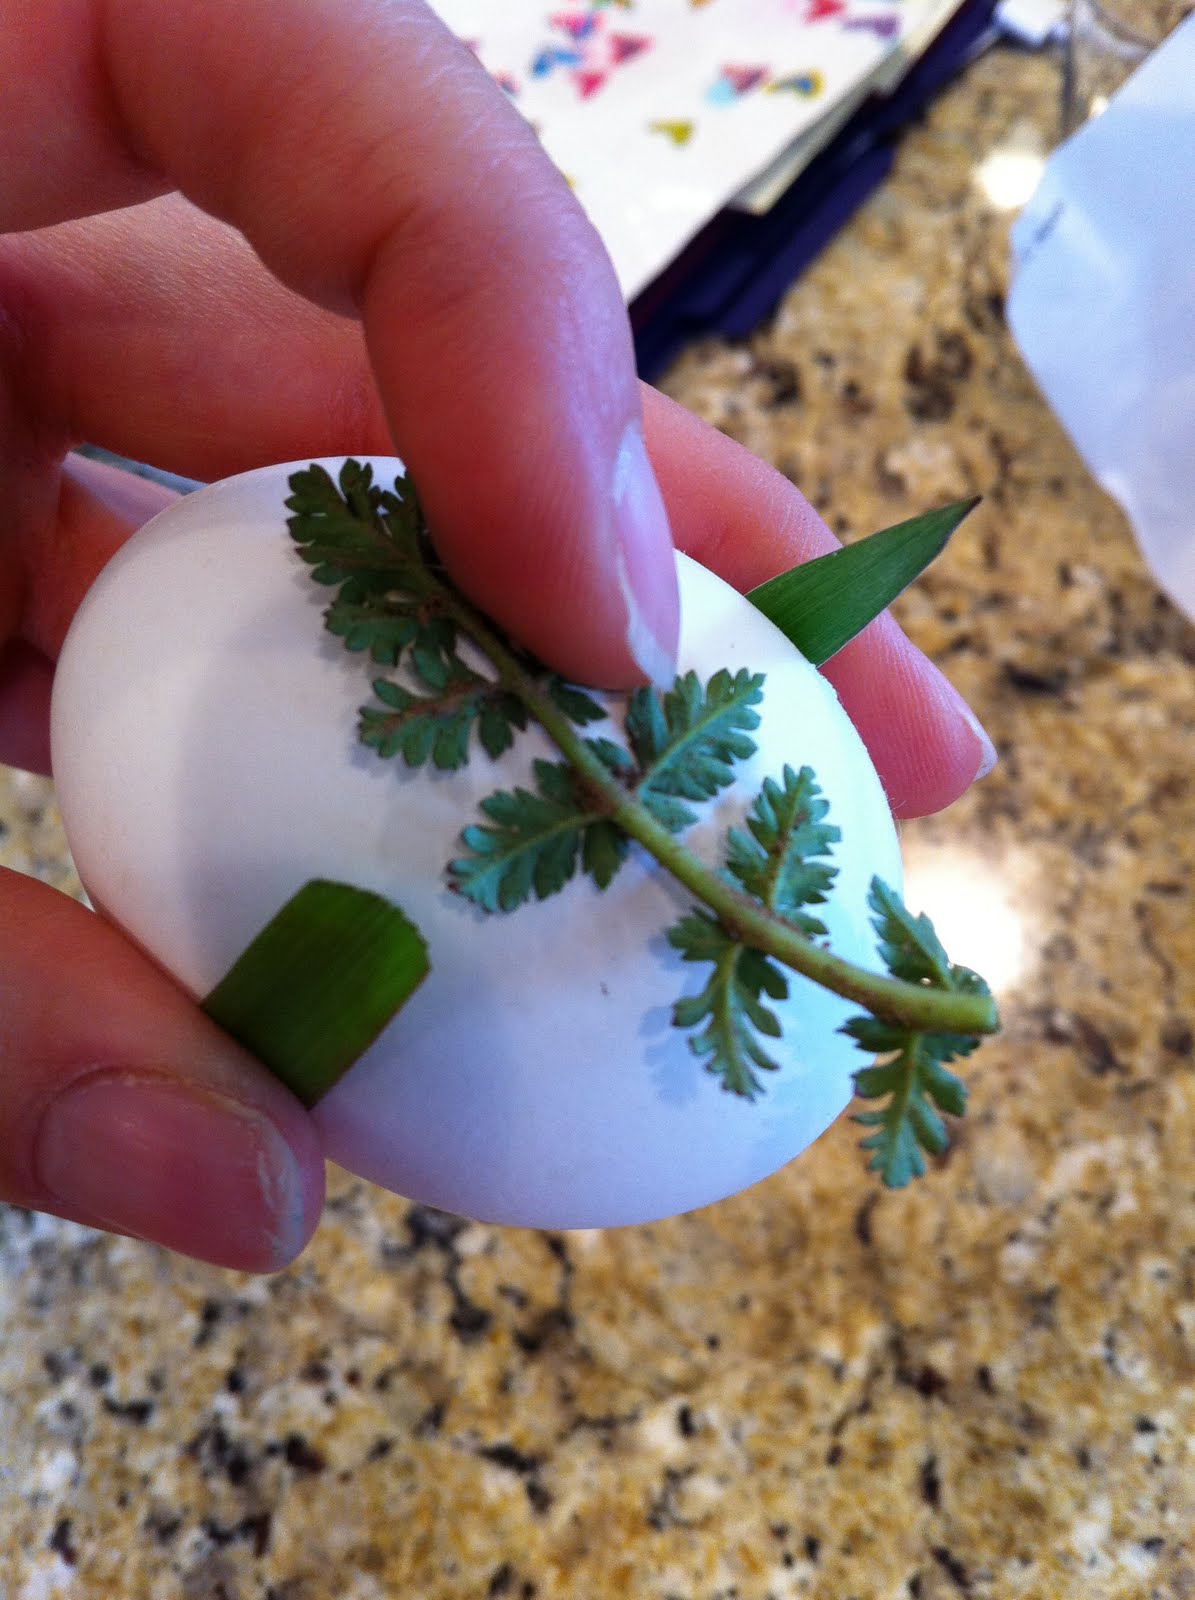
We went out into the backyard on the look out for interesting shaped leaves. We found weeds. That'll work! We pulled a few of them and brought them in the kitchen with our hardboiled eggs.

Now wrap your nature item(s) around the egg and cover it with a section of your old nylons (I cut about a 4" band). I secured it with a small rubberband.

Now dip it in any egg dye of your chosing.


You can also dye the egg BEFORE you put the nature items and nylon around it, then coat it in a darker color of dye. I tried it, but it might have turned out better with different colors:

The discovery of the nylon band saved my with my little guy, who was the messiest most horrible egg decorator! He had more fun, and stayed cleaner, using the nylon method, even without nature items inside it.
MELTED CRAYON EGGS
Items needed:
Old crayons (you won't need much, but a variety of colors is nice)
A papertowel, cloth, or some other way to handle a hot egg while decorating

I love these eggs! It's as simple as it sounds. Shortly after hard-boiling your eggs, start coloring on them with the crayons. It will pour over your eggs like shiny, thick paint!


Two problems with it though: (1) a hot egg is a little tricky for the young ones to handle. They might not be able to decorate the whole egg, but just make a picture or design on one side. (2) If you want to decorate the whole egg, it's hard to know how to hold or handle the hot egg as you rotate it because all the crayon is still melted and messy. Touch it and you ruin it. Wait until it cools, and you won't be able to melt the crayon on the hot egg.
The only solution I see is to have a candle or other hot item to directly melt the crayon, then color on the cold egg? I didn't try it.
Here's my favorite egg! I just used a consistent swirling motion with my red, purple, and yellow crayons:

RUBBER CEMENT EGGS:
Items Needed:
Rubber Cement Glue (or a clear/white crayon for less precise lines)
Egg Dye

I never would have thought to use rubber cement on easter eggs, but it is very effective in keeping the egg dye out of the space it has covered. The directions I read said to peel the glue off after it dried, but I found the layer of glue was so thin it didn't bother me, so I just left it on.
This is so kid friendly. Just dip your eggs in a color of your choice. Wait until it dries. Now paint it rubber cement and dip it again. You could probably even do it a third time using a new color, as long as the colors you were using got progressively darker. I didn't try the third time around.
Unfortunately I forgot to take individual pictures of the eggs we made using the rubber cement method. You'll have to look carefully at the eggs in the below picture. They're easy to spot. Two have stripes, a third is already pictured above, and thr fourth (very similar to the third) is pink and black.

Happy Easter and enjoy the eggs!

Now let me preface this post by saying that I know I'm no Martha-Stewart. You want Martha-Stewart looking eggs? You're looking for my sister...she, guaranteed, will make the most beautiful easter eggs you've ever seen. But me? I'm in it for the mess, and the memory with my kids. So here are some things we experimented with (as inspired by a 2007 edition of "Family Fun" magazine):
Nature Eggs
Items Needed:
A few interesting shaped leaves or flowers
An old pair of nylons
Egg Dye (you can get this anywhere, but I found mine at the Dollar Store)
We went out into the backyard on the look out for interesting shaped leaves. We found weeds. That'll work! We pulled a few of them and brought them in the kitchen with our hardboiled eggs.

Now wrap your nature item(s) around the egg and cover it with a section of your old nylons (I cut about a 4" band). I secured it with a small rubberband.

Now dip it in any egg dye of your chosing.


You can also dye the egg BEFORE you put the nature items and nylon around it, then coat it in a darker color of dye. I tried it, but it might have turned out better with different colors:

The discovery of the nylon band saved my with my little guy, who was the messiest most horrible egg decorator! He had more fun, and stayed cleaner, using the nylon method, even without nature items inside it.

MELTED CRAYON EGGS
Items needed:
Old crayons (you won't need much, but a variety of colors is nice)
A papertowel, cloth, or some other way to handle a hot egg while decorating

I love these eggs! It's as simple as it sounds. Shortly after hard-boiling your eggs, start coloring on them with the crayons. It will pour over your eggs like shiny, thick paint!


Two problems with it though: (1) a hot egg is a little tricky for the young ones to handle. They might not be able to decorate the whole egg, but just make a picture or design on one side. (2) If you want to decorate the whole egg, it's hard to know how to hold or handle the hot egg as you rotate it because all the crayon is still melted and messy. Touch it and you ruin it. Wait until it cools, and you won't be able to melt the crayon on the hot egg.
The only solution I see is to have a candle or other hot item to directly melt the crayon, then color on the cold egg? I didn't try it.
Here's my favorite egg! I just used a consistent swirling motion with my red, purple, and yellow crayons:

RUBBER CEMENT EGGS:
Items Needed:
Rubber Cement Glue (or a clear/white crayon for less precise lines)
Egg Dye

I never would have thought to use rubber cement on easter eggs, but it is very effective in keeping the egg dye out of the space it has covered. The directions I read said to peel the glue off after it dried, but I found the layer of glue was so thin it didn't bother me, so I just left it on.
This is so kid friendly. Just dip your eggs in a color of your choice. Wait until it dries. Now paint it rubber cement and dip it again. You could probably even do it a third time using a new color, as long as the colors you were using got progressively darker. I didn't try the third time around.
Unfortunately I forgot to take individual pictures of the eggs we made using the rubber cement method. You'll have to look carefully at the eggs in the below picture. They're easy to spot. Two have stripes, a third is already pictured above, and thr fourth (very similar to the third) is pink and black.

Happy Easter and enjoy the eggs!
Subscribe to:
Posts (Atom)